
贡献代码库#
代码标准#
编写良好的代码不仅在于您写了什么。还在于您*如何*编写它。在 Continuous Integration 测试期间,将运行多个工具来检查您的代码是否存在风格错误。生成任何警告都会导致测试失败。因此,良好的风格是提交代码到 pandas 的一个要求。
pandas 中有几种工具可以帮助贡献者在将更改贡献给项目之前进行验证
./ci/code_checks.sh:一个脚本,用于验证 doctests、docstrings 中的格式以及导入的模块。可以通过使用参数docstrings、code和doctests``(例如 ``./ci/code_checks.sh doctests)来独立运行检查;pre-commit,我们将在下一节中详细介绍。
此外,由于很多人使用我们的库,我们不能突然更改代码,以免可能破坏大量用户代码,也就是说,我们需要它尽可能地*向后兼容*,以避免大规模的破坏。
提交前检查#
此外,Continuous Integration 将使用 pre-commit hooks 运行代码格式化检查,例如 black, ruff, isort, 和 clang-format 等。这些检查的任何警告都会导致 Continuous Integration 失败;因此,在提交代码之前自行运行检查是很有帮助的。这可以通过安装 ``pre-commit``(如果您遵循了 Setting up your development environment 中的说明,则应该已经完成了)然后运行以下命令来实现:
pre-commit install
从 pandas 仓库的根目录执行。现在,每次提交更改时都会运行所有样式检查,而无需手动运行每个检查。此外,使用 pre-commit 还可以让您更轻松地跟上代码检查的变化。
请注意,如果需要,您可以使用 git commit --no-verify 跳过这些检查。
如果您不想将 pre-commit 作为工作流程的一部分,仍然可以使用以下方法之一来运行其检查:
pre-commit run --files <files you have modified>
pre-commit run --from-ref=upstream/main --to-ref=HEAD --all-files
而无需事先执行 pre-commit install。
最后,我们还进行了一些耗时的 pre-commit 检查,这些检查不会在每次提交时运行,但在持续集成过程中会运行。您可以使用以下命令手动触发它们:
pre-commit run --hook-stage manual --all-files
备注
您可能希望定期运行 pre-commit gc,以清理不再使用的仓库。
备注
如果您有冲突的 virtualenv 安装,可能会收到错误 - 请参阅 here 。
此外,由于 bug in virtualenv ,如果您使用 conda,可能会遇到问题。要解决此问题,您可以将 virtualenv 降级到 20.0.33 版本。
备注
如果您最近从上游分支合并了 main 分支,pre-commit 使用的一些依赖项可能已更改。请确保 update your development environment 。
可选依赖项#
应使用私有辅助函数 pandas.compat._optional.import_optional_dependency 来导入可选依赖项(例如 matplotlib)。这可以确保在缺少依赖项时发出一致的错误消息。
所有使用可选依赖项的方法都应包含一个测试,该测试断言在找不到可选依赖项时会引发 ImportError。如果库存在,则应跳过此测试。
所有可选依赖项都应在 可选依赖项 中进行记录,并且最低必需版本应在 pandas.compat._optional.VERSIONS 字典中设置。
向后兼容性#
请尽量保持向后兼容性。pandas 有大量的用户和大量的现有代码,因此如果可能,请不要破坏它们。如果您认为破坏是必需的,请在 pull request 中清楚说明原因。此外,更改方法签名时要小心,并在需要时添加弃用警告。另外,将弃用的 sphinx 指令添加到已弃用的函数或方法中。
如果存在一个与被弃用的函数具有相同参数的函数,您可以使用 pandas.util._decorators.deprecate:
from pandas.util._decorators import deprecate

deprecate('old_func', 'new_func', '1.1.0')
否则,您需要手动进行:
import warnings
from pandas.util._exceptions import find_stack_level


def old_func():
    """Summary of the function.

    .. deprecated:: 1.1.0
       Use new_func instead.
    """
    warnings.warn(
        'Use new_func instead.',
        FutureWarning,
        stacklevel=find_stack_level(),
    )
    new_func()


def new_func():
    pass
您还需要
编写一个新测试,该测试断言在使用已弃用的参数调用时会发出警告
更新 pandas 的所有现有测试和代码以使用新参数
有关更多信息,请参阅 测试警告 。
类型提示#
pandas 强烈鼓励使用 PEP 484 风格的类型提示。新开发应包含类型提示,接受注释现有代码的 pull request!
样式指南#
类型导入应遵循 from typing import ... 约定。您的代码可能会被自动重写以使用一些现代构造(例如,使用内置的 list 而不是 typing.List),这可以通过 pre-commit checks 实现。
在代码库的某些情况下,类可能会定义类变量,这些变量会覆盖内置变量。这会造成一个问题,如 Mypy 1775 Mypy 1775 中所述。这里的防御性解决方案是创建一个内置变量的明确别名,并在没有类型注解的情况下使用它。例如,如果您遇到一个定义,如下所示:
class SomeClass1:
    str = None
正确的注解方式如下:
str_type = str

class SomeClass2:
    str: str_type = None
在某些情况下,当您比分析器更了解类型时,可能会想从 typing 模块使用 cast。这尤其发生在自定义推断函数中。例如:
from typing import cast

from pandas.core.dtypes.common import is_number

def cannot_infer_bad(obj: Union[str, int, float]):

    if is_number(obj):
        ...
    else:  # Reasonably only str objects would reach this but...
        obj = cast(str, obj)  # Mypy complains without this!
        return obj.upper()
这里的限制是,尽管人类可以合理地理解 is_number 会捕获 int 和 float 类型,但 mypy 目前尚无法进行相同的推断(参见 mypy #5206 )。虽然上述方法有效,但 强烈不建议 使用 cast。在适用的情况下,最好重构代码以适应静态分析。
def cannot_infer_good(obj: Union[str, int, float]):

    if isinstance(obj, str):
        return obj.upper()
    else:
        ...
对于自定义类型和推断,这并非总是可行,因此会做出例外,但在走这条路之前,应尽一切努力避免使用 cast。
pandas 特定的类型#
pandas 中常用的特定类型将出现在 pandas._typing 中,您应该在适用时使用它们。该模块目前是私有的,但最终应该暴露给希望实现针对 pandas 类型检查的第三方库。
例如,pandas 中许多函数都接受 dtype 参数。这可以表示为字符串,如 "object",numpy 的 dtype,如 np.int64,甚至 pandas 的 ExtensionDtype,如 pd.CategoricalDtype。为了避免用户必须不断地注解所有这些选项,可以从 pandas._typing 模块导入并重用它们。
from pandas._typing import Dtype

def as_type(dtype: Dtype) -> ...:
    ...
该模块最终将包含用于重复概念的类型,如“路径类”(path-like)、“数组类”(array-like)、“数值类”(numeric)等,还可以包含常用参数的别名,如 axis。该模块的开发是活跃的,请务必参考源代码以获取最新可用的类型列表。
验证类型提示#
pandas 使用 mypy 和 pyright 来静态分析代码库和类型提示。在进行任何更改后,您可以通过运行以下命令来确保类型提示的一致性:
pre-commit run --hook-stage manual --all-files mypy
pre-commit run --hook-stage manual --all-files pyright
pre-commit run --hook-stage manual --all-files pyright_reportGeneralTypeIssues
# the following might fail if the installed pandas version does not correspond to your local git version
pre-commit run --hook-stage manual --all-files stubtest
在您的 python 环境中。
警告
请注意,上述命令将使用当前的 python 环境。如果您的 python 包比 pandas CI 安装的版本旧/新,上述命令可能会失败。当
mypy或numpy版本不匹配时,这种情况很常见。请参阅 how to setup the python environment 或选择一个 recently succeeded workflow ,选择 “Docstring validation, typing, and other manual pre-commit hooks” 作业,然后点击 “Set up Conda” 和 “Environment info” 来查看 pandas CI 安装的版本。
在代码中使用 pandas 测试类型提示#
警告
Pandas 尚未成为 py.typed 库 (PEP 561 !在本地将 pandas 声明为 py.typed 库的主要目的是测试和改进 pandas 内置的类型注解。
在 pandas 成为 py.typed 库之前,可以通过在 pandas 安装文件夹中创建一个名为 “py.typed” 的空文件来轻松地试验 pandas 附带的类型注解:
python -c "import pandas; import pathlib; (pathlib.Path(pandas.__path__[0]) / 'py.typed').touch()"
py.typed 文件的存在会向类型检查器发出信号,表示 pandas 已经是 py.typed 库。这使得类型检查器能够识别 pandas 附带的类型注解。
通过持续集成进行测试#
一旦您提交了拉取请求,pandas 的测试套件将在 GitHub Actions 持续集成服务上自动运行。但是,如果您想在提交拉取请求之前在分支上运行测试套件,则需要将持续集成服务挂钩到您的 GitHub 存储库。以下是有关 GitHub Actions 的说明。
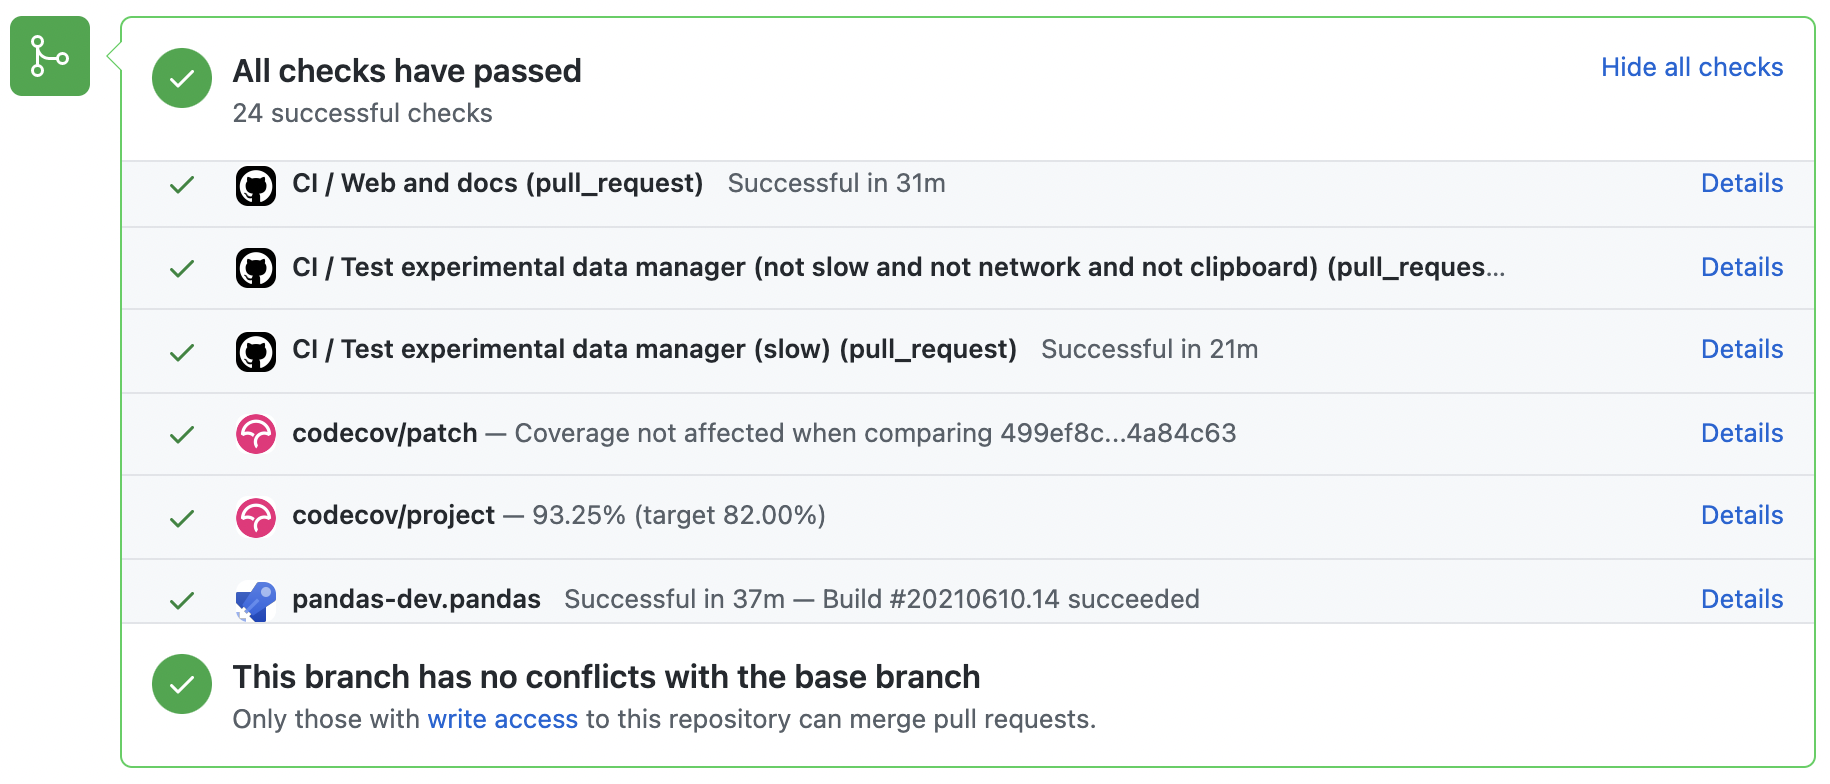
当所有构建都显示为“绿色”时,将考虑合并拉取请求。如果任何测试失败,您将看到一个红色的“X”,您可以点击它来查看单个失败的测试。这是一个绿色构建的示例。
面向测试驱动开发#
pandas is serious about testing and strongly encourages contributors to embrace test-driven development (TDD). This development process “relies on the repetition of a very short development cycle: first the developer writes an (initially failing) automated test case that defines a desired improvement or new function, then produces the minimum amount of code to pass that test.” So, before actually writing any code, you should write your tests. Often the test can be taken from the original GitHub issue. However, it is always worth considering additional use cases and writing corresponding tests.
在代码被推送到 pandas 后,添加测试是最常见的请求之一。因此,养成提前编写测试的习惯是值得的,这样就不会有问题。
编写测试#
所有测试都应该放在特定包的 tests 子目录中。这个文件夹包含许多现有的测试示例,我们建议你从中获取灵感。
作为一个通用技巧,你可以使用集成开发环境 (IDE) 的搜索功能,或者在终端中使用 git grep 命令来查找调用了某个方法的文件。如果你不确定测试的最佳存放位置,请猜测一个,但请注意,审查者可能会要求你将测试移动到其他位置。
要使用 git grep,你可以在终端中运行以下命令:
git grep "function_name("
这将搜索你的存储库中的所有文件,查找文本 function_name(。这是一种快速定位代码库中某个函数并确定添加测试的最佳位置的有用方法。
理想情况下,测试应该只有一个明显的归属位置。在我们达到这个理想之前,以下是一些关于测试位置的经验法则。
你的测试是否只依赖于
pd._libs.tslibs中的代码?这个测试可能属于以下之一:tests.tslibs
备注
tests.tslibs中的任何文件都不应该导入pd._libs.tslibs之外的任何 pandas 模块。tests.scalar
tests.tseries.offsets
你的测试是否只依赖于 pd._libs 中的代码?这个测试可能属于以下之一:
tests.libs
tests.groupby.test_libgroupby
你的测试是否是针对算术或比较方法?这个测试可能属于以下之一:
tests.arithmetic
备注
这些测试旨在用于可以使用
box_with_arrayfixture 来测试 DataFrame/Series/Index/ExtensionArray 行为的共享测试。tests.frame.test_arithmetic
tests.series.test_arithmetic
你的测试是否是针对归约方法(min, max, sum, prod, …)?这个测试可能属于以下之一:
tests.reductions
备注
这些测试旨在用于测试 DataFrame/Series/Index/ExtensionArray 行为的共享测试。
tests.frame.test_reductions
tests.series.test_reductions
tests.test_nanops
你的测试是否是针对索引方法?这是决定测试归属最困难的情况,因为这些测试有很多,而且许多测试的方法不止一个(例如
Series.__getitem__和Series.loc.__getitem__)。这个测试是否专门测试 Index 方法(例如
Index.get_loc,Index.get_indexer)?这个测试可能属于以下之一:tests.indexes.test_indexing
tests.indexes.fooindex.test_indexing
在这些文件中,应该有一个特定于方法的测试类,例如
TestGetLoc。在大多数情况下,这些测试中不应需要
Series或DataFrame对象。这个测试是否是针对 Series 或 DataFrame 的索引方法,但 不 是
__getitem__或__setitem__,例如xs,where,take,mask,lookup或insert?这个测试可能属于以下之一:tests.frame.indexing.test_methodname
tests.series.indexing.test_methodname
这个测试是针对
loc,iloc,at或iat之一的吗?这个测试可能属于以下之一:tests.indexing.test_loc
tests.indexing.test_iloc
tests.indexing.test_at
tests.indexing.test_iat
在适当的文件中,测试类对应于索引器的类型(例如
TestLocBooleanMask)或主要的用例(例如TestLocSetitemWithExpansion)。请参阅D)部分关于测试多种索引方法的说明。
这是针对
Series.__getitem__,Series.__setitem__,DataFrame.__getitem__, 或DataFrame.__setitem__的测试吗?此测试可能属于以下之一:tests.series.test_getitem
tests.series.test_setitem
tests.frame.test_getitem
tests.frame.test_setitem
如果有许多情况,此类测试可能测试多种类似的方法,例如:
import pandas as pd
import pandas._testing as tm

def test_getitem_listlike_of_ints():
    ser = pd.Series(range(5))

    result = ser[[3, 4]]
    expected = pd.Series([2, 3])
    tm.assert_series_equal(result, expected)

    result = ser.loc[[3, 4]]
    tm.assert_series_equal(result, expected)
在这种情况下,测试位置应基于正在测试的*底层*方法。或者,如果是用于修复错误(bugfix)的测试,则应基于实际错误的位置。因此,在此示例中,我们知道
Series.__getitem__调用Series.loc.__getitem__,所以这*实际上*是针对loc.__getitem__的测试。因此,此测试属于tests.indexing.test_loc。您的测试是针对 DataFrame 还是 Series 方法?
该方法是绘图方法吗?此测试可能属于以下之一:
tests.plotting
该方法是 IO 方法吗?此测试可能属于以下之一:
tests.io
备注
这包括
to_string但不包括__repr__,后者在tests.frame.test_repr和tests.series.test_repr中进行测试。其他类通常有一个test_formats文件。
否则,此测试可能属于以下之一:
tests.series.methods.test_mymethod
tests.frame.methods.test_mymethod
备注
如果一个测试可以通过 frame_or_series 夹具在 DataFrame/Series 之间共享,按照惯例,它应该放在
tests.frame文件中。
您的测试是针对 Index 方法,不依赖于 Series/DataFrame 吗?此测试可能属于以下之一:
tests.indexes
您的测试是否针对 pandas 提供的任何 ExtensionArrays(
Categorical,DatetimeArray,TimedeltaArray,PeriodArray,IntervalArray,NumpyExtensionArray,FloatArray,BoolArray,StringArray)?此测试可能属于以下之一:tests.arrays
您的测试是否针对*所有* ExtensionArray 子类(“EA 接口”)?此测试可能属于以下之一:
tests.extension
使用 pytest#
测试结构#
pandas 现有的测试结构*大部分*是面向类的,这意味着您通常会发现测试被包含在类中。
class TestReallyCoolFeature:
    def test_cool_feature_aspect(self):
        pass
我们更倾向于使用 pytest 框架的*函数式*风格,它提供了一个更丰富的测试框架,这将有助于测试和开发。因此,我们将编写如下的测试函数,而不是编写测试类:
def test_really_cool_feature():
    pass
推荐的 pytest 惯用法#
命名为
def test_*的函数式测试,并且*只*接受夹具(fixtures)或参数(parameters)作为参数。使用裸露的
assert测试标量值和布尔真值。分别使用
tm.assert_series_equal(result, expected)和tm.assert_frame_equal(result, expected)来比较Series和DataFrame的结果。当测试多个用例时,请使用 @pytest.mark.parameterize 。
当预期测试用例会失败时,请使用 pytest.mark.xfail 。
当测试用例永远不会成功时,请使用 pytest.mark.skip 。
当测试用例需要特定标记时,请使用 pytest.param 。
如果多个测试可以共享一个设置对象,请使用 @pytest.fixture 。
警告
不要使用 pytest.xfail``(这与 ``pytest.mark.xfail 不同),因为它会立即停止测试并且不检查测试是否真的会失败。如果您希望这种行为,请改用 pytest.skip。
如果已知一个测试会失败,但失败的方式并不是为了被捕获,请使用 pytest.mark.xfail。通常使用此方法来测试表现出错误行为或未实现功能的测试。如果失败的测试具有不稳定的行为,请使用参数 strict=False。这将导致 pytest 在测试碰巧通过时不会失败。使用 strict=False 是非常不可取的,请仅作为最后的手段使用。
更偏好使用装饰器 @pytest.mark.xfail 和参数 pytest.param,而不是在测试内部使用,以便在 pytest 的收集阶段正确标记测试。对于涉及多个参数、夹具或这些组合的测试进行 xfail,只能在测试阶段进行 xfail。要做到这一点,请使用 request 夹具:
def test_xfail(request):
    mark = pytest.mark.xfail(raises=TypeError, reason="Indicate why here")
    request.applymarker(mark)
xfail 不应用于涉及因用户参数无效而失败的测试。对于这些测试,我们需要使用 pytest.raises 来验证是否引发了正确的异常类型和错误消息。
测试警告#
将 tm.assert_produces_warning 用作上下文管理器,以检查代码块是否引发了警告。
with tm.assert_produces_warning(DeprecationWarning):
    pd.deprecated_function()
如果要确保在代码块中不发生特定警告,请将 False 传递给上下文管理器。
with tm.assert_produces_warning(False):
    pd.no_warning_function()
如果您有一个会发出警告的测试,但实际上并不测试警告本身(例如,因为它将在未来被删除,或者因为我们正在匹配第三方库的行为),那么请使用 pytest.mark.filterwarnings 忽略该错误。
@pytest.mark.filterwarnings("ignore:msg:category")
def test_thing(self):
    pass
测试异常#
将 pytest.raises 用作上下文管理器,并指定特定的异常子类(即,切勿使用 Exception )和异常消息中的 match。
with pytest.raises(ValueError, match="an error"):
    raise ValueError("an error")
涉及文件的测试#
tm.ensure_clean 上下文管理器会为测试创建一个临时文件,该文件具有一个生成的文件名(或您提供的文件名),并在退出上下文块时自动删除。
with tm.ensure_clean('my_file_path') as path:
    # do something with the path
涉及网络连接的测试#
A unit test should not access a public data set over the internet due to flakiness of network connections and
lack of ownership of the server that is being connected to. To mock this interaction, use the httpserver fixture from the
pytest-localserver plugin. with synthetic data.
@pytest.mark.network
@pytest.mark.single_cpu
def test_network(httpserver):
    httpserver.serve_content(content="content")
    result = pd.read_html(httpserver.url)
示例#
这是一个独立的测试集示例,位于文件 pandas/tests/test_cool_feature.py 中,演示了我们喜欢使用的多项功能。请记住,在添加新测试时,请将 GitHub Issue Number 作为注释添加。
import pytest
import numpy as np
import pandas as pd


@pytest.mark.parametrize('dtype', ['int8', 'int16', 'int32', 'int64'])
def test_dtypes(dtype):
    assert str(np.dtype(dtype)) == dtype


@pytest.mark.parametrize(
    'dtype', ['float32', pytest.param('int16', marks=pytest.mark.skip),
              pytest.param('int32', marks=pytest.mark.xfail(
                  reason='to show how it works'))])
def test_mark(dtype):
    assert str(np.dtype(dtype)) == 'float32'


@pytest.fixture
def series():
    return pd.Series([1, 2, 3])


@pytest.fixture(params=['int8', 'int16', 'int32', 'int64'])
def dtype(request):
    return request.param


def test_series(series, dtype):
    # GH <issue_number>
    result = series.astype(dtype)
    assert result.dtype == dtype

    expected = pd.Series([1, 2, 3], dtype=dtype)
    tm.assert_series_equal(result, expected)
运行此示例将产生
((pandas) bash-3.2$ pytest  test_cool_feature.py  -v
=========================== test session starts ===========================
platform darwin -- Python 3.6.2, pytest-3.6.0, py-1.4.31, pluggy-0.4.0
collected 11 items

tester.py::test_dtypes[int8] PASSED
tester.py::test_dtypes[int16] PASSED
tester.py::test_dtypes[int32] PASSED
tester.py::test_dtypes[int64] PASSED
tester.py::test_mark[float32] PASSED
tester.py::test_mark[int16] SKIPPED
tester.py::test_mark[int32] xfail
tester.py::test_series[int8] PASSED
tester.py::test_series[int16] PASSED
tester.py::test_series[int32] PASSED
tester.py::test_series[int64] PASSED
已 参数化 的测试现在可以通过测试名称访问,例如,我们可以使用 -k int8 来运行这些测试,以*仅*选择与 int8 匹配的测试。
((pandas) bash-3.2$ pytest  test_cool_feature.py  -v -k int8
=========================== test session starts ===========================
platform darwin -- Python 3.6.2, pytest-3.6.0, py-1.4.31, pluggy-0.4.0
collected 11 items

test_cool_feature.py::test_dtypes[int8] PASSED
test_cool_feature.py::test_series[int8] PASSED
使用 hypothesis#
Hypothesis 是一个用于基于属性的测试的库。您无需显式地参数化测试,而是可以描述*所有*有效输入,让 Hypothesis 尝试找到一个失败的输入。更好的是,无论它尝试多少个随机示例,Hypothesis 始终会报告一个最小的失败示例来反驳您的断言——通常是您从未想过要测试的示例。
有关更多介绍,请参阅 Getting Started with Hypothesis ,然后 refer to the Hypothesis documentation for details 。
import json
from hypothesis import given, strategies as st

any_json_value = st.deferred(lambda: st.one_of(
    st.none(), st.booleans(), st.floats(allow_nan=False), st.text(),
    st.lists(any_json_value), st.dictionaries(st.text(), any_json_value)
))


@given(value=any_json_value)
def test_json_roundtrip(value):
    result = json.loads(json.dumps(value))
    assert value == result
此测试展示了 Hypothesis 的几项有用功能,并演示了一个很好的用例:检查在大量或复杂的输入域中应保持的属性。
为了使 pandas 测试套件保持快速运行,当输入或逻辑简单时,首选参数化测试,而 Hypothesis 测试则保留用于逻辑复杂或选项组合过多或交互微妙以至于无法测试(或想到!)所有这些情况的场景。
运行测试套件#
然后,您可以在 Git 克隆中直接运行测试(无需安装 pandas),方法是键入::
pytest pandas
备注
如果少量测试未通过,这可能不是您的 pandas 安装问题。某些测试(例如,一些 SQLAlchemy 测试)需要额外的设置,其他测试可能由于未固定版本的库发布了新版本而开始失败,还有一些测试在并行运行时可能会不稳定。只要您可以从本地构建的版本导入 pandas,您的安装可能没问题,您可以开始贡献了!
通常,在运行整个测试套件之前,先运行您所做更改周围的一小部分测试会很有价值(技巧:您可以使用 pandas-coverage app )来找出哪些测试会触及您修改过的代码行,然后只运行那些测试)。
最简单的方法是使用::
pytest pandas/path/to/test.py -k regex_matching_test_name
或者使用以下构造之一::
pytest pandas/tests/[test-module].py
pytest pandas/tests/[test-module].py::[TestClass]
pytest pandas/tests/[test-module].py::[TestClass]::[test_method]
使用 pytest-xdist (包含在我们的“pandas-dev”环境中)可以在多核机器上加速本地测试。然后,可以在运行 pytest 时指定 -n 数字标志,以在指定的核心数量上并行运行测试,或使用 auto 来利用您机器上的所有可用核心。
# Utilize 4 cores
pytest -n 4 pandas

# Utilizes all available cores
pytest -n auto pandas
如果您想进一步加快速度,更高级地使用此命令可以这样操作:
pytest pandas -n 4 -m "not slow and not network and not db and not single_cpu" -r sxX
除了多线程性能提升外,还可以通过使用 -m 标记来跳过一些测试,从而提高测试速度:
slow:任何耗时较长的测试(以秒计,而非毫秒)
network:需要网络连接的测试
db:需要数据库(mysql 或 postgres)的测试
single_cpu:应仅在单个 CPU 上运行的测试
如果以下选项与您相关,您可能希望启用它们:
arm_slow:在 arm64 架构上耗时较长的任何测试
这些标记是在 in this toml file 的 [tool.pytest.ini_options] 下的 markers 列表中定义的,如果您想检查是否有新增您感兴趣的标记,可以在此查看。
-r 报告标记将显示简短的摘要信息(请参阅 pytest documentation )。这里我们显示了以下数量:
s:跳过的测试
x:失败的测试 (xfailed)
X:通过的失败测试 (xpassed)
摘要是可选的,如果您不需要额外信息,可以将其移除。使用并行化选项可以显著缩短在提交拉取请求之前本地运行测试所需的时间。
如果您需要有关测试结果的帮助(过去曾发生过),请在运行命令并报告 bug 之前设置一个种子,这样我们就可以复现问题。以下是在 Windows 上设置种子的示例:
set PYTHONHASHSEED=314159265
pytest pandas -n 4 -m "not slow and not network and not db and not single_cpu" -r sxX
在 Unix 系统上使用:
export PYTHONHASHSEED=314159265
pytest pandas -n 4 -m "not slow and not network and not db and not single_cpu" -r sxX
更多信息,请参阅 pytest 文档。
此外,还可以运行:
pd.test()
并导入 pandas 来运行类似的测试。
运行性能测试套件#
性能很重要,值得考虑您的代码是否引入了性能回归。pandas 正在迁移到 asv benchmarks ,以便轻松监控关键 pandas 操作的性能。这些基准测试都在 pandas/asv_bench 目录中,测试结果可以在 here 找到。
要使用 asv 的所有功能,您需要 conda 或 virtualenv。有关更多详细信息,请查阅 asv installation webpage 。
安装 asv:
pip install git+https://github.com/airspeed-velocity/asv
如果您需要运行基准测试,请将目录更改为 asv_bench/ 并运行:
asv continuous -f 1.1 upstream/main HEAD
您可以将 HEAD 替换为您正在处理的分支名称,并报告变化超过 10% 的基准测试。该命令默认使用 conda 来创建基准测试环境。如果您想改用 virtualenv,请执行:
asv continuous -f 1.1 -E virtualenv upstream/main HEAD
应将 -E virtualenv 选项添加到所有运行基准测试的 asv 命令中。默认值在 asv.conf.json 中定义。
运行完整的基准测试套件可能需要一整天的时间,具体取决于您的硬件和资源利用率。但是,通常只需要将部分结果粘贴到拉取请求中,以证明所提交的更改不会导致意外的性能回归。您可以使用 -b 标志运行特定的基准测试,该标志接受一个正则表达式。例如,这将只运行 pandas/asv_bench/benchmarks/groupby.py 文件中的基准测试:
asv continuous -f 1.1 upstream/main HEAD -b ^groupby
如果您只想运行文件中的特定基准测试组,可以使用 . 作为分隔符。例如:
asv continuous -f 1.1 upstream/main HEAD -b groupby.GroupByMethods
将只运行 groupby.py 中定义的 GroupByMethods 基准测试。
您也可以使用当前 Python 环境中已安装的 pandas 版本来运行基准测试套件。如果您没有 virtualenv 或 conda,或者正在使用上面讨论的 setup.py develop 方法,这会很有用;对于就地构建,您需要设置 PYTHONPATH,例如 PYTHONPATH="$PWD/.." asv [remaining arguments]。您可以通过以下方式使用现有 Python 环境运行基准测试:
asv run -e -E existing
或者,要使用特定的 Python 解释器:
asv run -e -E existing:python3.6
这将显示基准测试的 stderr,并使用您 $PATH 中的本地 python。
有关如何编写基准测试以及如何使用 asv 的信息,请参阅 asv documentation 。
文档化您的代码#
更改应反映在位于 doc/source/whatsnew/vx.y.z.rst 的发布说明中。此文件包含每个版本的持续变更日志。请向此文件添加一个条目来记录您的修复、增强或(不可避免的)破坏性更改。在添加条目时,请确保包含 GitHub 问题编号(使用 :issue:`1234` ``,其中 ``1234 是问题/拉取请求编号)。您的条目应使用完整的句子和正确的语法书写。
在提及 API 的部分时,请酌情使用 Sphinx 的 :func:、:meth: 或 :class: 指令。并非所有公共 API 函数和方法都有文档页面;理想情况下,只有在链接有效时才应添加链接。通过查看先前版本的发布说明,通常可以找到类似的示例。
如果您的代码是 bug 修复,请将您的条目添加到相关的 bug 修复部分。避免添加到 Other 部分;只有在极少数情况下条目才应放在那里。在尽可能简洁的情况下,对 bug 的描述应包括用户可能遇到它的方式以及 bug 本身的迹象,例如“产生不正确的结果”或“错误地引发”。可能还需要指示新的行为。
如果您的代码是增强功能,则很可能需要向现有文档添加用法示例。这可以按照关于 documentation 的部分进行。此外,为了让用户知道此功能何时添加,将使用 versionadded 指令。其 Sphinx 语法如下:
.. versionadded:: 2.1.0
这将把文本 New in version 2.1.0 放在您放置 Sphinx 指令的任何位置。在添加新函数或方法(example )或新关键字参数(example )时,也应将其放入 docstring 中。